티스토리 뷰
FCM(Firebase Cloud Messaging)같은 경우는 공식문서와 설정 튜토리얼이 정말 잘 되어있어서 공식 문서를 따라가시는 것도 좋을 것 같습니다!
⚠️ 원격 푸시를 구현하기 위해선 개발자 계정 멤버십이 필요합니다. (멤버십은 대략 1년에 13만원이고 FCM은 무료입니다)
I. Key 발급
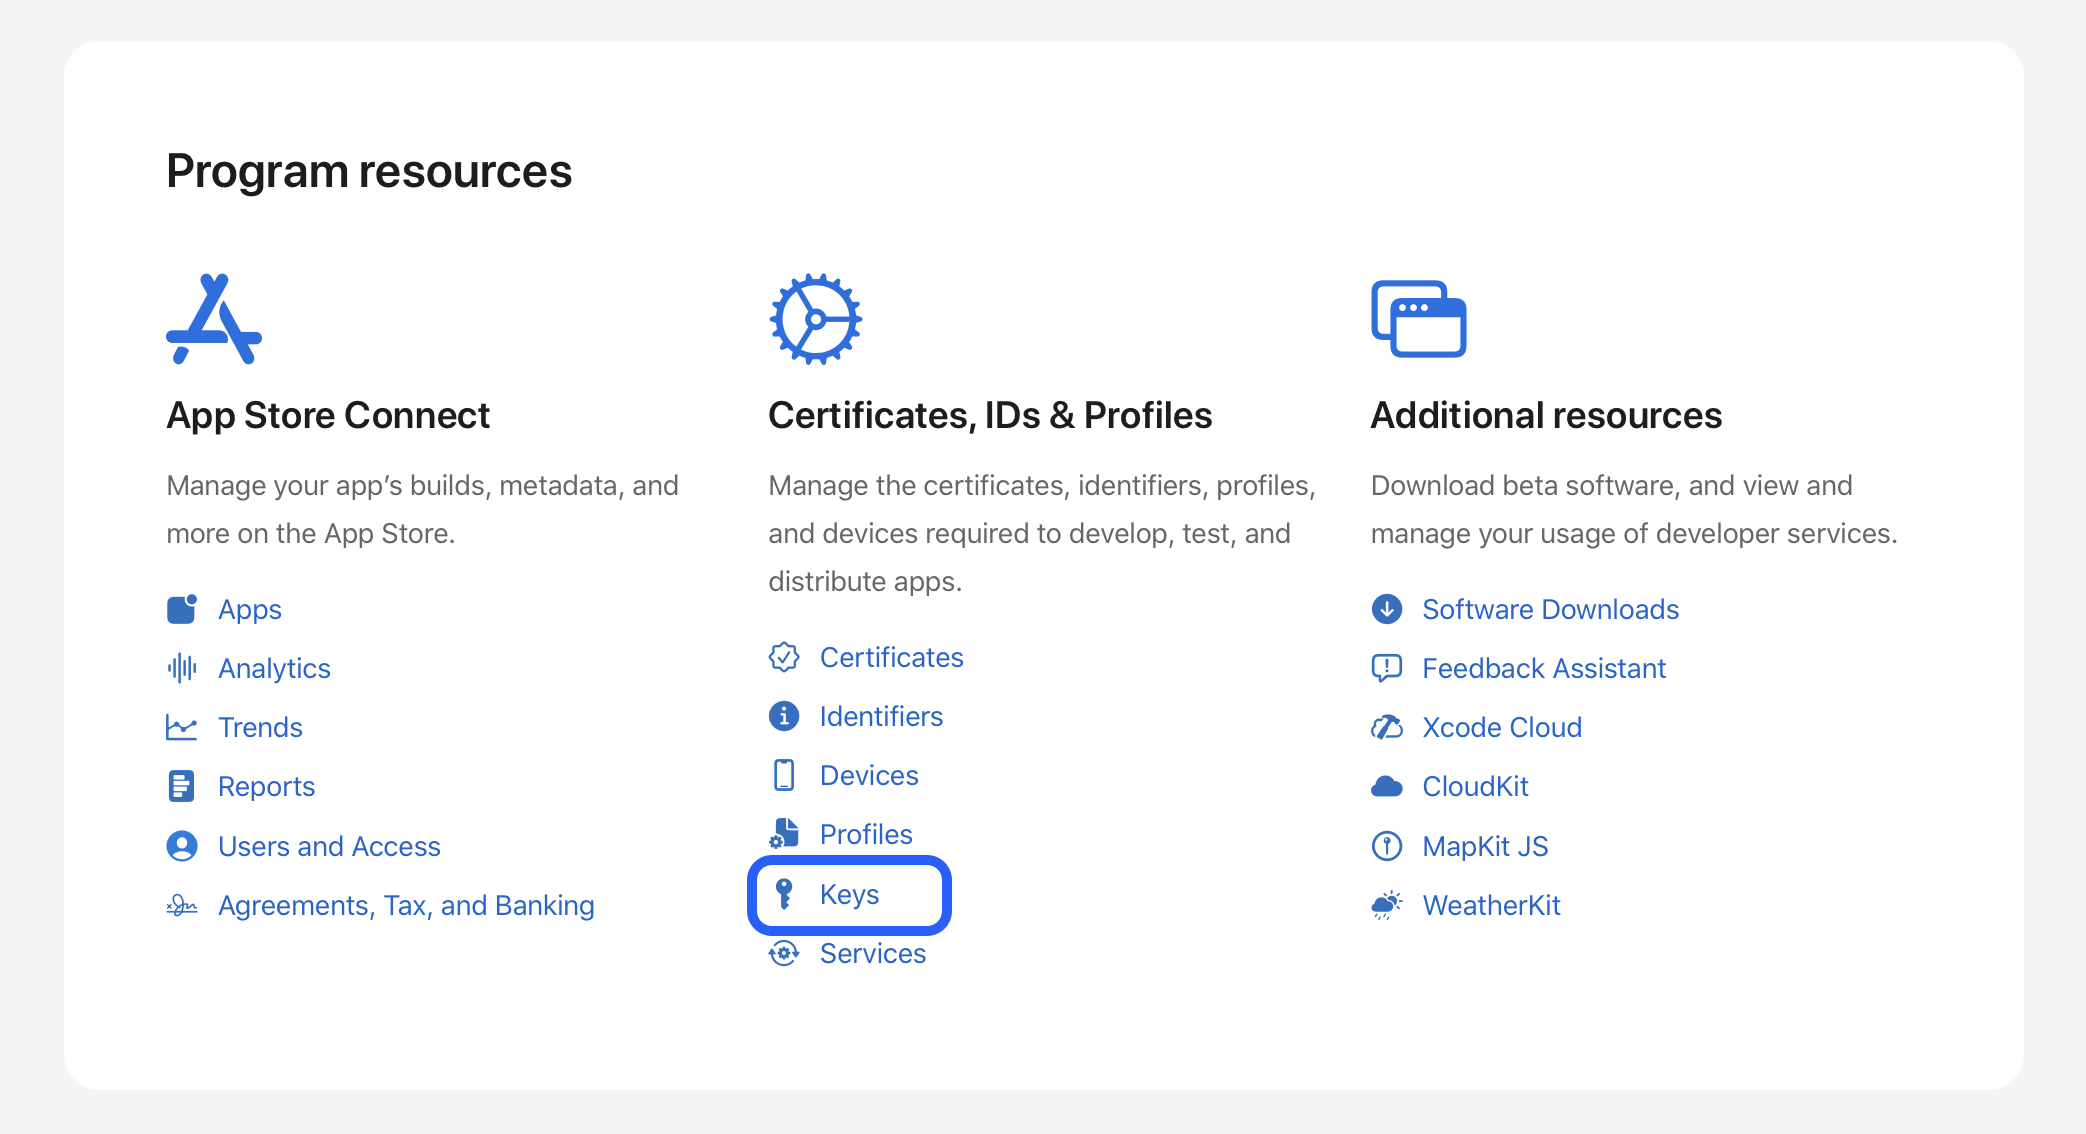
1. 우선 먼저 Apple Developer Member Center에서 Keys에 들어가줍니다.

2. 그리고 Keys옆의 +버튼을 눌러 키를 생성합니다.

3. 적절한 이름을 작성하고, Apple Push Notification Service (APNs)항목에 체크합니다.

4. Continue > Register 를 완료하면 Download 버튼이 생깁니다. 이를 통해 p8파일을 다운로드합니다.
이때 한번 다운로드 한 키파일은 재다운로드 할 수 없으니 안전한 곳에 보관해야합니다!

II. Firebase 프로젝트 설정
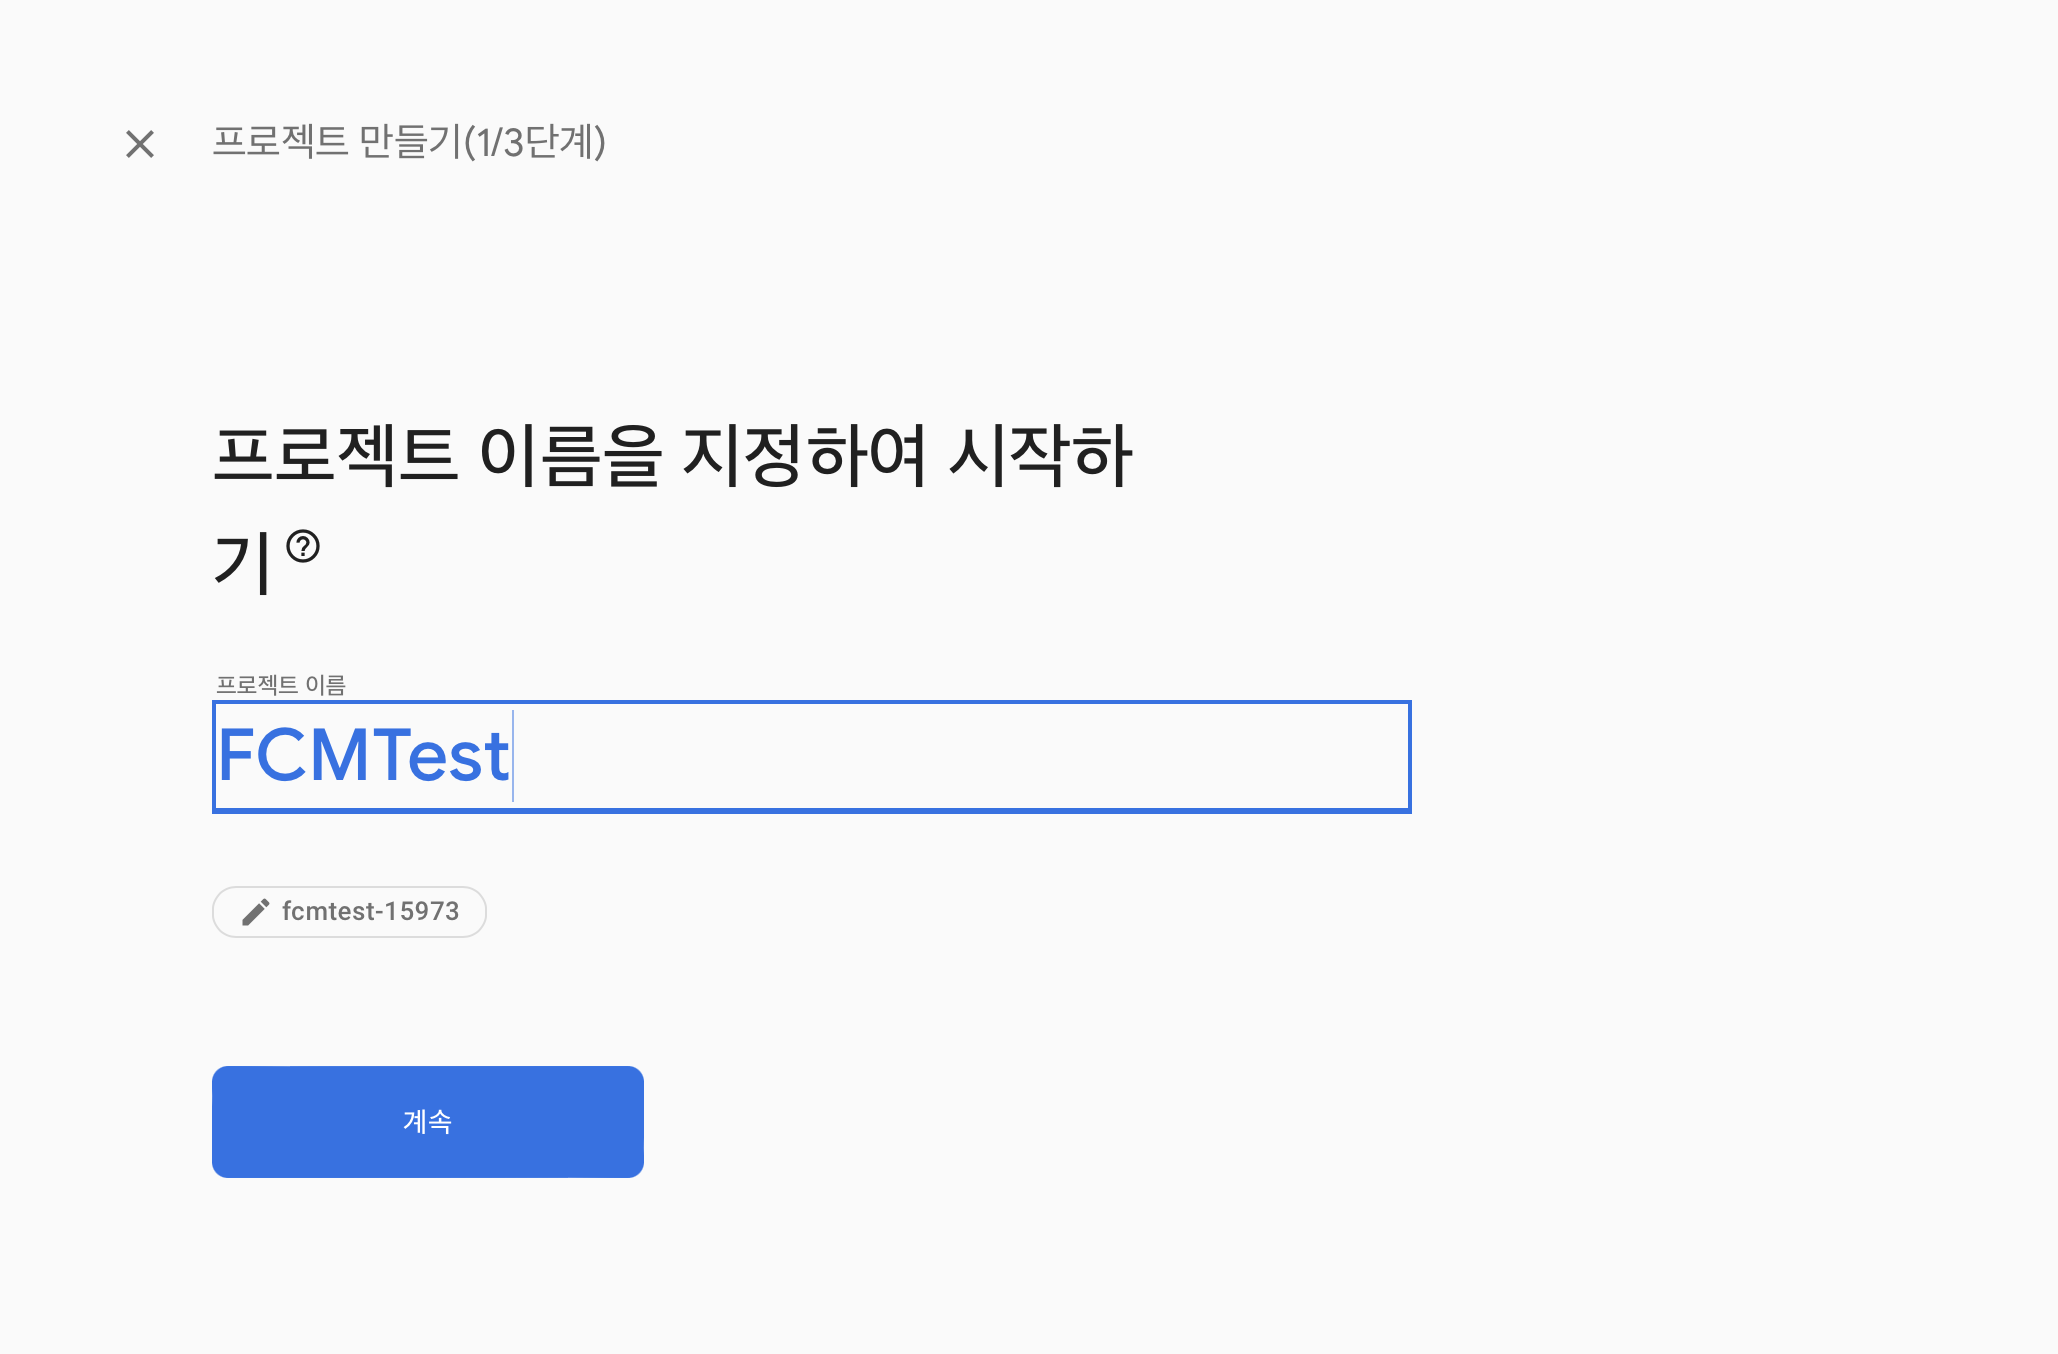
1. 기존에 파이어베이스 솔루션을 쓰고 있었다면 해당 프로젝트에서, 아니라면 새 프로젝트를 생성합니다.


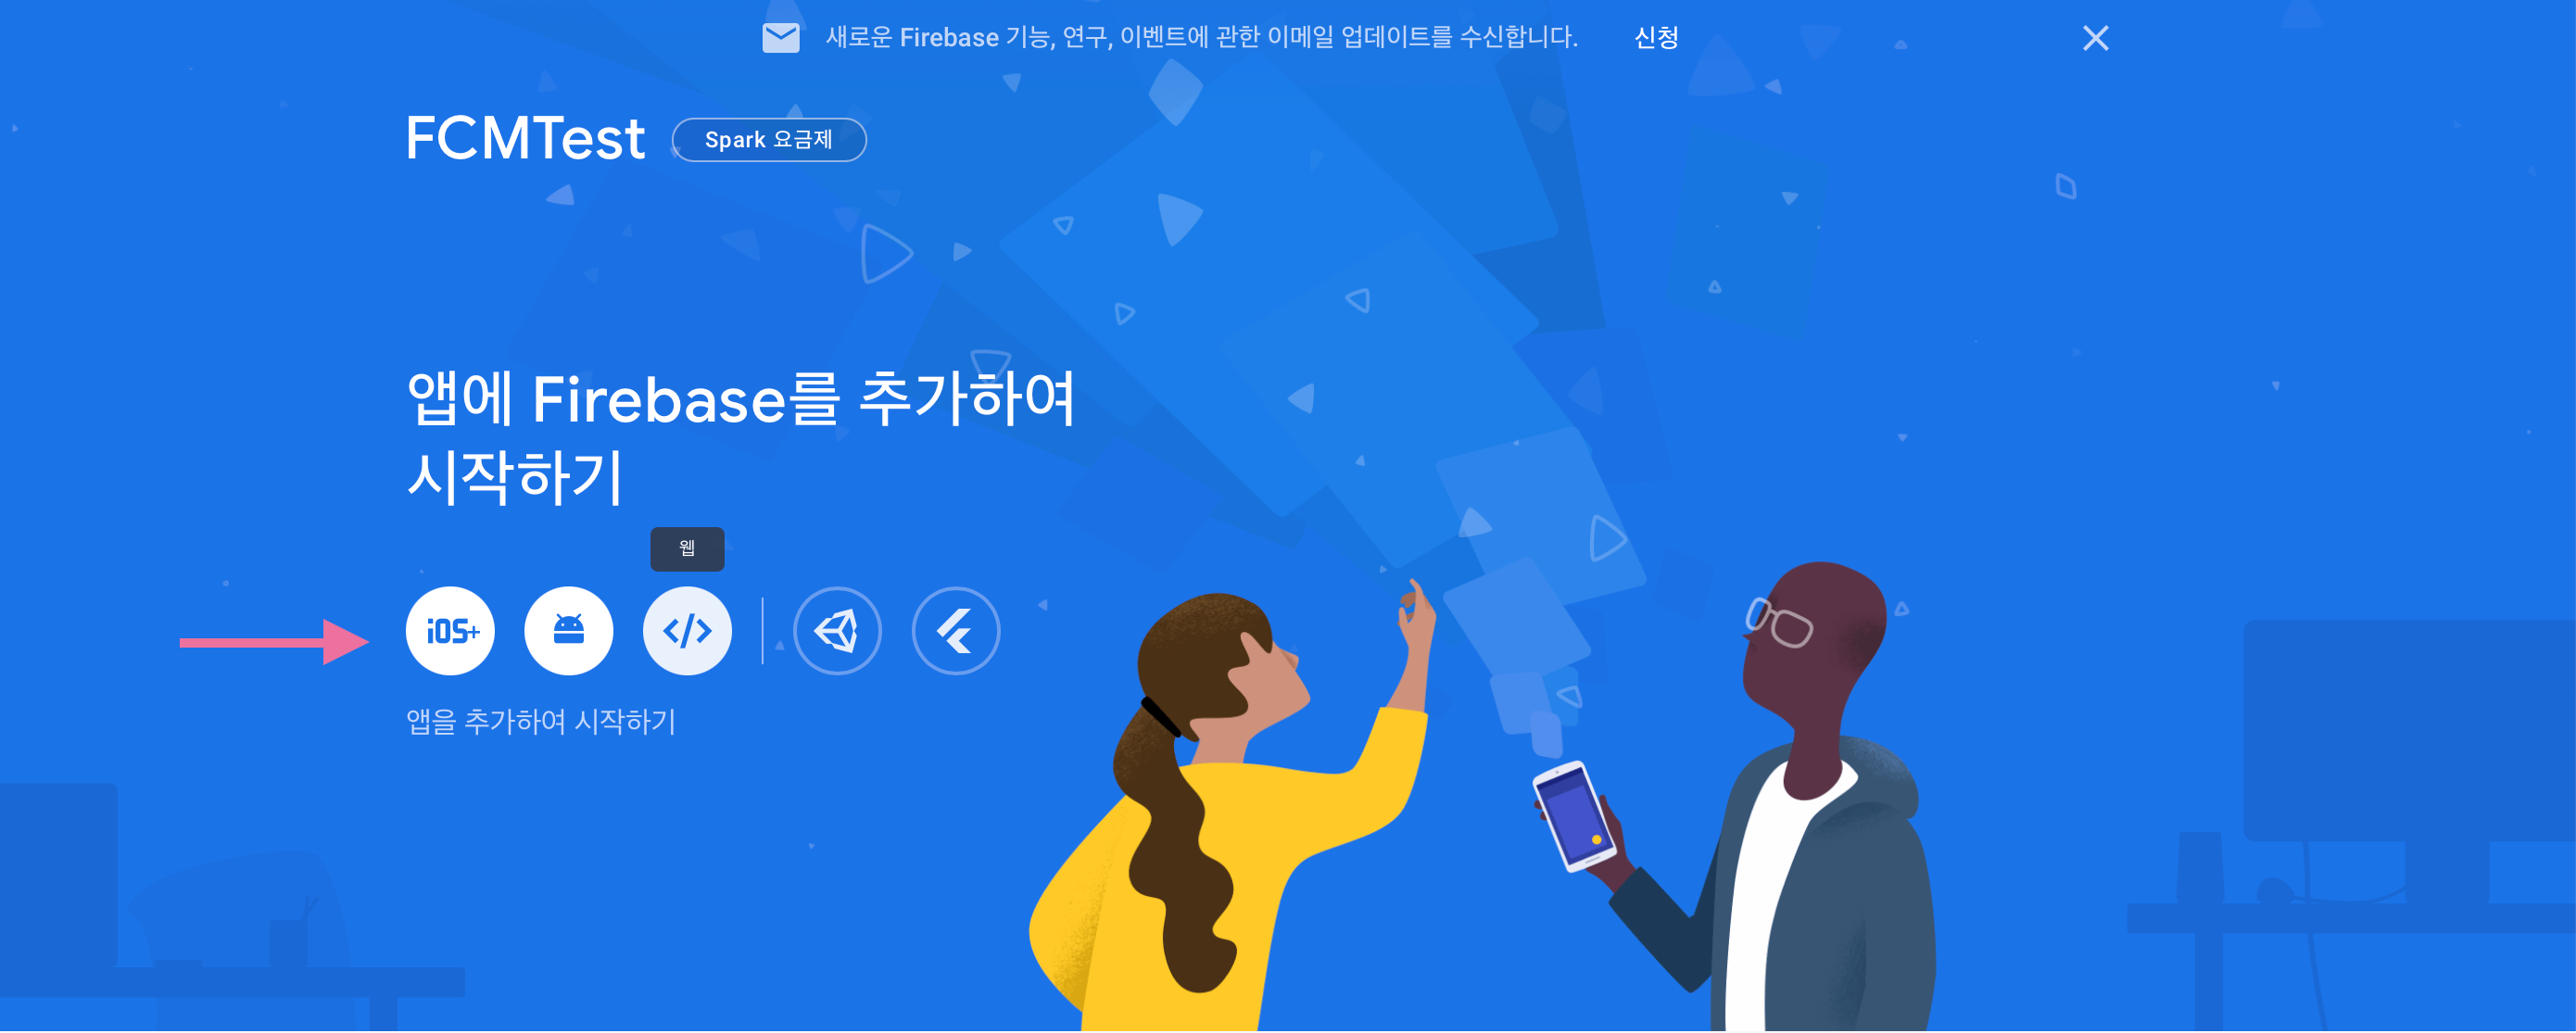
2. 메인(개요)에서 iOS버튼을 클릭해 iOS프로젝트를 추가합니다.

3. 이후 안내대로 따라가면 됩니다.
저는 App Store ID는 생략했습니다. 이후 GoogleService info 파일 추가, firebase SDK 설치, AppDelegate 설정등을 진행해주시면 됩니다.

이때 앱 번들 ID는 Project부분의 Bundle Identifier와 꼭 일치시켜주세요!

4. 완료 후 프로젝트 왼쪽 상단의 설정 부분으로 들어갑니다.

5. 클라우드 메세징 탭으로 들어가 APN 인증키 업로드를 진행합니다.
APN인증서는 예전 방식이므로 p8 파일을 업로드하는 APN 인증 키 부분을 이용하시면 됩니다.

아까 받아두었던 인증키 파일을 업로드해주고 나머지 항목도 안내에 따라 Apple Develper Member Center에서 찾아 채워줍니다.

III. Xcode 프로젝트 설정
1. Xcode project 부분에서 +Capability를 클릭합니다.

2. Push Notifications와 Background Modes를 추가합니다.


3. Background Modes에서 Remote notifications를 체크해줍니다.

IV. AppDelegate설정
UIKit 프로젝트의 경우 그대로 앱델리게이트를 사용하면 되고 SwiftUI라면 아래와 같이 설정해주어야합니다.
// App.swift
@main
struct AtchIApp: App {
    @UIApplicationDelegateAdaptor(AppDelegate.self) var delegate // ✅ 추가

	//...
}

// AppDelegate.swift
// ✅ AppDelegate 클래스 생성
class AppDelegate: NSObject, UIApplicationDelegate {
	// ...
}
그 다음 AppDelegate를 다음과 같이 채워줍니다. import 부분과 Delegate 채택, 파라미터 이름등에 주의하여 작성해주세요!
import Foundation
import Firebase
import UserNotifications

class AppDelegate: NSObject, UIApplicationDelegate {
    func application(_ application: UIApplication,
                     didFinishLaunchingWithOptions launchOptions: [UIApplication.LaunchOptionsKey : Any]? = nil) -> Bool {

        // 파이어베이스 설정
        FirebaseApp.configure()

        // 앱 실행 시 사용자에게 알림 허용 권한을 받음
        UNUserNotificationCenter.current().delegate = self

        let authOptions: UNAuthorizationOptions = [.alert, .badge, .sound] // 필요한 알림 권한을 설정
        UNUserNotificationCenter.current().requestAuthorization(
            options: authOptions,
            completionHandler: { _, _ in }
        )

        // UNUserNotificationCenterDelegate를 구현한 메서드를 실행시킴
        application.registerForRemoteNotifications()

        // 파이어베이스 Meesaging 설정
        Messaging.messaging().delegate = self

        return true
    }
}

extension AppDelegate: UNUserNotificationCenterDelegate {

    // 백그라운드에서 푸시 알림을 탭했을 때 실행
    func application(_ application: UIApplication,
                     didRegisterForRemoteNotificationsWithDeviceToken deviceToken: Data) {
        print("APNS token: \(deviceToken)")
        Messaging.messaging().apnsToken = deviceToken
    }

    // Foreground(앱 켜진 상태)에서도 알림 오는 설정
    func userNotificationCenter(_ center: UNUserNotificationCenter, willPresent notification: UNNotification, withCompletionHandler completionHandler: @escaping (UNNotificationPresentationOptions) -> Void) {
        completionHandler([.list, .banner])
    }
}

extension AppDelegate: MessagingDelegate {

    // 파이어베이스 MessagingDelegate 설정
    func messaging(_ messaging: Messaging, didReceiveRegistrationToken fcmToken: String?) {
      print("Firebase registration token: \(String(describing: fcmToken))")

      let dataDict: [String: String] = ["token": fcmToken ?? ""]
      NotificationCenter.default.post(
        name: Notification.Name("FCMToken"),
        object: nil,
        userInfo: dataDict
      )
      // TODO: If necessary send token to application server.
      // Note: This callback is fired at each app startup and whenever a new token is generated.
    }
}
☑️ 공식 튜토리얼엔 없는 내용인데, 앱이 화면에 켜져있는 상태에서도 push notification을 받고 싶다면 아래 메서드를 꼭 추가해주세요!func userNotificationCenter(_ center: UNUserNotificationCenter, willPresent notification: UNNotification, withCompletionHandler completionHandler: @escaping (UNNotificationPresentationOptions) -> Void) { completionHandler([.list, .banner]) }
5. 빌드한 후에 FCM토큰을 복사해놓습니다.
작업을 마친 앱을 빌드해보면 아래와 같이 토큰이 출력되는데 이를 잘 복사해놓습니다.

⚠️ 빌드를 돌렸을 때 공식 문서에서 제공하는 아래 코드로 인해 몇몇 에러들이 출력되는데요, 원인은 정확히 찾지 못했지만 기능 동작에는 문제가 없었으니 참고해주세요! (위 코드에선 생략했습니다)
1 [Error :- APNS device token not set before retrieving FCM Token for Sender ID '836092823410'. Notifications to this FCM Token will not be delivered over APNS.Be sure to re-retrieve the FCM token once the APNS device token is set]Messaging.messaging().token { token, error in if let error = error { print("Error fetching FCM registration token: \(error)") } else if let token = token { print("FCM registration token: \(token)") } }
2 [Declining request for FCM Token since no APNS Token specified]
3 [Error Domain=com.google.fcm Code=505 "No APNS token specified before fetching FCM Token" UserInfo={NSLocalizedFailureReason=No APNS token specified before fetching FCM Token}]
V. 테스트 해보기
1. 다시 파이어베이스 콘솔로 돌아가 Messaging > 첫 번째 캠페인 만들기를 클릭합니다.

2. Firebase 알림 메시지를 선택하고 다음 창에서 내용을 채워줍니다.


3. 테스트 전송하기 버튼을 눌러 테스트를 진행합니다.
이때 아까 복사해두었던 토큰을 입력합니다.

4. 테스트를 전송하면 아래와 같이 푸시 알림이 오게 됩니다.
앱 활성화 중에도 알림을 받을 수 있도록 설정해 두어서 앱 실행중에도 알림을 확인할 수 있습니다.
사실 시뮬레이터에선 안될 줄 알았는데 잘 되네요!!


5. 이후 캠페인 절차를 모두 수행해서 알림을 등록해두면 대략 2~3분 뒤에 알림이 옵니다.
마치며
꼭 FCM으로만 원격 푸시 알림을 구현할 수 있는 것은 아니지만, 기존에 있는 솔루션 중 가장 간단하고 편리한 것 같습니다 👍
ref.
'iOS' 카테고리의 다른 글
| [iOS] 로컬 Push Notification(푸시 알림) 시간 · 주기 설정하기 + 관리 (0) | 2023.05.17 |
|---|---|
| [iOS] 로컬 Push Notification(푸시 알림) 구현하기 (1) | 2023.05.17 |
| [Swift] Combine에서 에러 핸들링하기 (0) | 2023.05.15 |
| [Xcode] 문서 주석(Doc comments) 작성하기, DocC 만들기 (1) | 2023.05.10 |
| [iOS] Swift Concurrency 공식 문서 정리 (1) | 2023.04.26 |
- Total
- Today
- Yesterday
- Architecture Pattern
- SWM
- 프로그래머스
- Flux
- 아키텍쳐 패턴
- MVVM
- 노션
- programmers
- 리액티브 프로그래밍
- GetX
- Bloking/Non-bloking
- healthkit
- MVI
- RX
- 소프트웨어마에스트로
- Flutter
- Swift Concurrency
- notion
- MVC
- swift
- ios
- 비동기/동기
- reactive programming
- SwiftUI
- DocC
- design pattern
- 코디네이터 패턴
- coordinator pattern
- TestCode
- combine
| 일 | 월 | 화 | 수 | 목 | 금 | 토 |
|---|---|---|---|---|---|---|
| 1 | 2 | 3 | 4 | 5 | 6 | 7 |
| 8 | 9 | 10 | 11 | 12 | 13 | 14 |
| 15 | 16 | 17 | 18 | 19 | 20 | 21 |
| 22 | 23 | 24 | 25 | 26 | 27 | 28 |
